It’s been awhile since my last post, and by awhile I mean 2 years! We did not fall off the face of the Earth, as it might seem. In an effort to keep my blog in chronological order, to read this in chronological order you’ll need to jump down to the post: Winter 2012/2013.
Sunday, January 18, 2015
November 2014 - Quick Visit
Once again I went back to Utah for work for a week in November. This time, I made it up though! Completed since September – second triangle window was installed and the remaining 2nd floor joists had been installed.
View of the second floor from front door – this quarter of the first floor is open to the 2nd floor, which is why the joists end.

Here is that corner that has now dried out. You can see how it’s harder to get these smooth because I can’t get the right tools to fit into the opening. I have some ideas for improvement going forward, we’ll see how that works. You can also see all of the residue that we’ll need to clean up. Around the corners I basically give up on anything other than getting the chinking to stick!

Next: We’re planning on going out for another week in June 2015, more chinking to come…

August/September 2014 - Still Chinking...
Still needing a lot finished, Kenyon and I went out (without kids) over Labor Day weekend. A lot had happened since we’d been gone: all of the remaining windows installed (with the exception of 1 of the triangle windows in gable end), front door installed, bathroom framed in, most of the second floor joists installed.
View of Family Room from “Front” Door (The front door is really on the side of the house and the kitchen door is the small door on the front of the house.)

View of the bathroom/laundry room (framed in) from front door.

View of master bedroom area from front door.

View of the kitchen area from family room

View of the kitchen/eating area/family room from kitchen door.

Outside of valley wall (sliding door out of family room)

View of the upstairs from loft (valley side) looking out to road side (where bedrooms will be)


View from loft into open area over front door

And more chinking…

When we left in September, there was 1/4th of 3 rows left on the lake side, the front side was finished, the tent side has 2 rows left, and the whole valley side is left. We will also need to touch-up around some of the windows and do most of the corners. It seems like this will take forever!
July 2014 - Even More Chinking!
We felt like we still had so much to do when we left in June that Kenyon decided to go back over 4th of July weekend. No one else was able to go with him or help out, so he was out there by himself, but he finished the front wall and was able to finish a couple other rows.


June 2014 - Chinking!
We decided to start with the side that people will hardly ever see to test this out. Step One: Cut strips of insulation and stuff it into the area between the logs.


Next are the nails to help provide a scaffold for the chinking. The nails are put in with a modified nail gun and then have to be bent up (individually, with a hammer) to be flush with where the chinking will go. This is extremely tedious.
(Nails inserted)

(Half of this row of nails has been bent up)

We had heard from other association members that some people had used painter’s tape to help with the cleanup of the chinking, because cleaning up the drips etc. can be difficult. As people who love straight lines we wanted to try it. Spoiler alert: We decided it wasn’t worth the hassle and amount of work and tape that would be necessary.

We had a section of logs that had been cut out that we used to test out the chinking. For illustrative purposes, here’s a picture of the cross-section once the chinking has been completed.

It took awhile to get our mix just right, but we finally came up with a “recipe” that worked with our current climate conditions. If it’s too wet, it runs out or sags and doesn’t seal properly, if it’s too dry it also doesn’t seal. Once again, our friend David came out and worked with us during our experimental phase.
Once we got going, it was a 3-step process.
Step 1: Just get the material into the spot

Step 2: Push it in and sort of smooth it out

Step 3: Final smoothing. The smoothing also involves a lot of jiggling. All of these steps are using cement-type trowels. (Left side is final; right side is after step 2, but before 3.)

Some of the considerations for doing the chinking are that the color may be slightly different depending on how long it takes to dry, what the weather is like, etc. It can be a pain to add chinking to some that’s already there. So, you want to do it all at once. Obviously, it is impossible to do everything at once (when you’re working with 3 people), so our focus was on getting a whole line done and then trying to get one whole side done at once. Since the sides of our house go downhill, we needed a significant number of ladders to accomplish this. Luckily, we have great neighbors who let us borrow theirs because we wouldn’t have been able to do it with just our own.

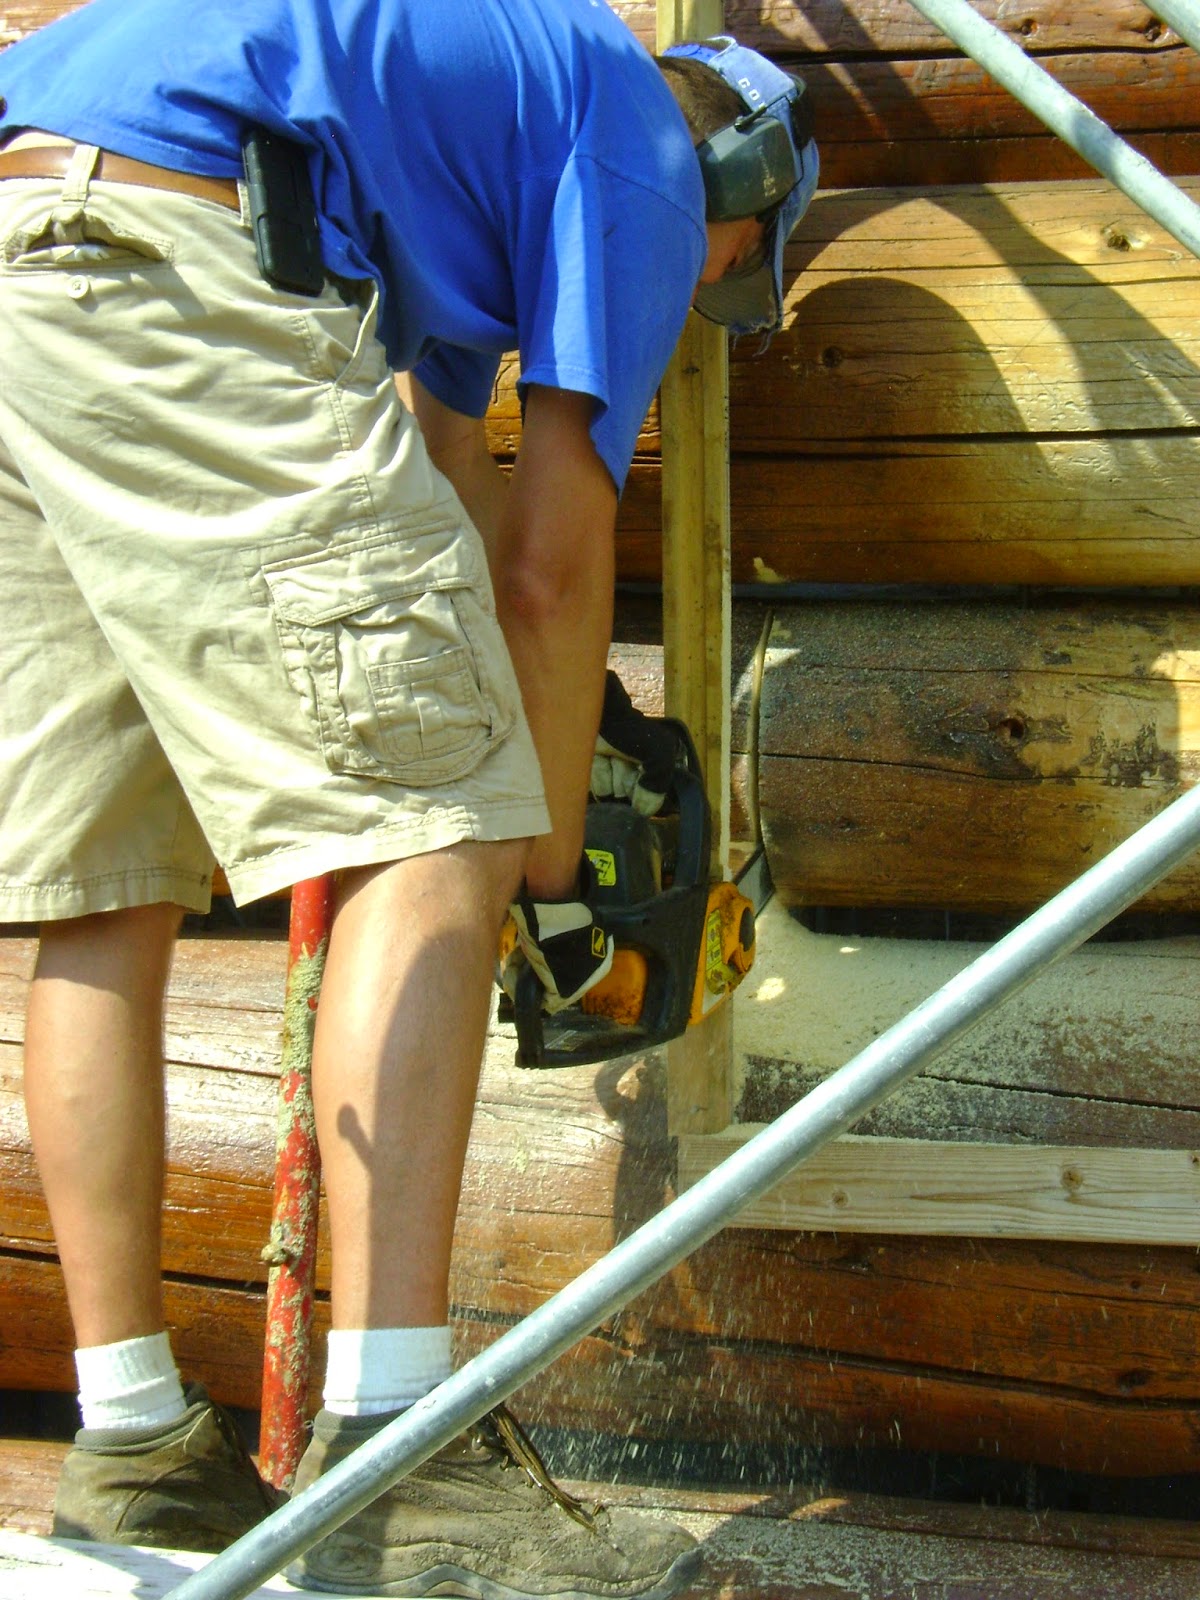
I cannot stress enough how tedious this job is. To make matters worse, you also have to chink around the windows and around the girder log that’s sticking out. As with many of our projects, Kenyon’s responsibility is the volume work while mine is the detail work.


I started a few corners. This is a real exercise in patience. You can’t get all of it in one pass (at least I can’t) because it takes too much chinking. So, you need to do one application, wait for that to dry/harden, and then go back with more to fill in, and so on. The problem with this is varying colors and textures as it dries. In this picture the dark part is wet and just put on so once it dries, the color will fade, but may not match the rest exactly. I was only able to get a few corners finished.

What we found was that we could take this down to a 2-step process with the use of a good spray bottle. Kenyon would shove the chinking in and I would go behind him, spray it and smooth it. With just the right about of smoothing, jiggling, and pressure, you can do it in just two passes.

Another huge accomplishment of this trip was the installation of the 6-foot by 6-foot window in the upper portion of the open loft area. This is a fixed window, rather than a slider, so we couldn’t remove a pane to make it lighter. It took 5 men and scaffolding set up as steps to get it in – but it happened. I kept worrying that they were going to put it in and it would fall outward down 3 stories in front of the basement. I cannot express how grateful we are to our neighbors and Kenyon’s dad for all of the help they have given us over the years (and especially with the window!).


When we left in June, the side wall was 2/3 chinked and the front wall was half chinked.


Next are the nails to help provide a scaffold for the chinking. The nails are put in with a modified nail gun and then have to be bent up (individually, with a hammer) to be flush with where the chinking will go. This is extremely tedious.
(Nails inserted)

(Half of this row of nails has been bent up)

We had heard from other association members that some people had used painter’s tape to help with the cleanup of the chinking, because cleaning up the drips etc. can be difficult. As people who love straight lines we wanted to try it. Spoiler alert: We decided it wasn’t worth the hassle and amount of work and tape that would be necessary.

We had a section of logs that had been cut out that we used to test out the chinking. For illustrative purposes, here’s a picture of the cross-section once the chinking has been completed.

It took awhile to get our mix just right, but we finally came up with a “recipe” that worked with our current climate conditions. If it’s too wet, it runs out or sags and doesn’t seal properly, if it’s too dry it also doesn’t seal. Once again, our friend David came out and worked with us during our experimental phase.
Once we got going, it was a 3-step process.
Step 1: Just get the material into the spot

Step 2: Push it in and sort of smooth it out

Step 3: Final smoothing. The smoothing also involves a lot of jiggling. All of these steps are using cement-type trowels. (Left side is final; right side is after step 2, but before 3.)

Some of the considerations for doing the chinking are that the color may be slightly different depending on how long it takes to dry, what the weather is like, etc. It can be a pain to add chinking to some that’s already there. So, you want to do it all at once. Obviously, it is impossible to do everything at once (when you’re working with 3 people), so our focus was on getting a whole line done and then trying to get one whole side done at once. Since the sides of our house go downhill, we needed a significant number of ladders to accomplish this. Luckily, we have great neighbors who let us borrow theirs because we wouldn’t have been able to do it with just our own.

I cannot stress enough how tedious this job is. To make matters worse, you also have to chink around the windows and around the girder log that’s sticking out. As with many of our projects, Kenyon’s responsibility is the volume work while mine is the detail work.


I started a few corners. This is a real exercise in patience. You can’t get all of it in one pass (at least I can’t) because it takes too much chinking. So, you need to do one application, wait for that to dry/harden, and then go back with more to fill in, and so on. The problem with this is varying colors and textures as it dries. In this picture the dark part is wet and just put on so once it dries, the color will fade, but may not match the rest exactly. I was only able to get a few corners finished.

What we found was that we could take this down to a 2-step process with the use of a good spray bottle. Kenyon would shove the chinking in and I would go behind him, spray it and smooth it. With just the right about of smoothing, jiggling, and pressure, you can do it in just two passes.

Another huge accomplishment of this trip was the installation of the 6-foot by 6-foot window in the upper portion of the open loft area. This is a fixed window, rather than a slider, so we couldn’t remove a pane to make it lighter. It took 5 men and scaffolding set up as steps to get it in – but it happened. I kept worrying that they were going to put it in and it would fall outward down 3 stories in front of the basement. I cannot express how grateful we are to our neighbors and Kenyon’s dad for all of the help they have given us over the years (and especially with the window!).


When we left in June, the side wall was 2/3 chinked and the front wall was half chinked.

2014
In April 2014, Kenyon and I were both able to arrange our work trips to Utah at similar times, so we were there for a weekend. We knew that we would be going out for about 10 days in June (with the kids) so we wanted to take some time to determine our plan for June, determine what we needed, and review our “living” situation to determine what we needed. The plan was for me to be out a few days earlier than him and I wanted to be able to have all of the supplies ready that we needed to optimize Kenyon’s time.
Most exciting part – the floor was in! It was amazing to step into the cabin and walk around on the first floor and look out. The views were better than we had imagined.


When we returned in June 2014 our plan was to work on the exterior chinking (the “stuff between the logs”). In order to do that, we needed to have all of the windows installed. When we returned in June 2014 the two remaining first floor windows had been installed, the sliding door out to the (future) deck had been installed, the cut for the “front door” had been made, and one of the five remaining second floor windows had been installed. Plus, the contractor worked on the remaining windows while we were there.
Since one of the upstairs windows was done, we were able to climb up and look out. It was amazing. I took so many pictures! I have to share at least one, OK maybe two! When you’re looking out you will see a little bit of overhang of the roof, which we left in the picture to give perspective.


Labor Day 2013
Kenyon was able to go back over Labor Day weekend and work with his dad. They were able to get two more windows on the sides completed. We had also worked out with the contractor what tasks he was going to prioritize. In order to do some of the things we asked, he wanted to put in the first floor to make it easier. So, that weekend Kenyon and his dad had to remove all of the scaffolding from the inside and do some other miscellaneous projects that were necessary so the floor could go in.
That closes out 2013. I actually had gone back to Utah in November 2013 for work for a week. At the end of the week I had planned to drive up and check out the progress. After a week of decent weather, the morning I was to drive up there a snowstorm came in. I still went up and made it up the highway, through the canyon and up into the “neighborhood” mountain road, but the snow proved too much for my little front wheel drive rental car when I got to the uphill, gravel road that our cabin is actually on. I tried to make it several times but it hadn’t been plowed and I was worried about getting the car stuck. I didn’t have any boots and there was nowhere to leave the car and try to hike up. So, 2013 ended without any more updates!
That closes out 2013. I actually had gone back to Utah in November 2013 for work for a week. At the end of the week I had planned to drive up and check out the progress. After a week of decent weather, the morning I was to drive up there a snowstorm came in. I still went up and made it up the highway, through the canyon and up into the “neighborhood” mountain road, but the snow proved too much for my little front wheel drive rental car when I got to the uphill, gravel road that our cabin is actually on. I tried to make it several times but it hadn’t been plowed and I was worried about getting the car stuck. I didn’t have any boots and there was nowhere to leave the car and try to hike up. So, 2013 ended without any more updates!
2013
Kenyon and I traveled back to Utah for 5 days in July 2013. His dad was once again there to help us. Whoever that was that insisted upon getting a travel trailer for sleeping the year before was a genius. We left the kids with my parents. It was nice being able to work without kids, without Kenyon’s old job of being on call 24 hours a day and being able to work all day and just go to bed up there. So, here’s where we started in 2013:

The roof is complete, the house is stained, and the trim is stained and on. So, our next step is windows. One big benefit of getting the windows in is that people can stop looking at the cabin and saying, “But there’s no windows?”
Since you just cut a square into the logs for the window, you need something for the window to go into and be attached. So, we built boxes for the windows to go into, and then used the box to mark on the wall where the cuts should be. Once again this was another exercise in measuring distances without any straight lines or flat spaces to determine the spacing of where the window should be placed on the wall.

Then we outlined the box to make a guide for cutting and removed the box.

Then, it was time for the first cut. This was pretty scary because we’d never cut into our house before and there’s no going back!


This process took much longer than we anticipated.

First window cut. This is the small kitchen window that we decided to start with. The part that is really time consuming are any horizontal cuts. Ideally, the top of the window would go in between two logs, as this one did, and the bottom would also go in between two logs, so no horizontal cuts are needed. But, with a set window size but varying log sizes, that’s just not possible. So, you have to try to make a straight horizontal cut, which is pretty difficult. This is not as easy as it looks on TV!
Once the hole has been cut, we tried to fit the box back in, of course since the cuts weren’t perfect this was easier said than done. Then came the process of trying to shave parts off.

What happens to the log pieces once they’ve been cut out, you ask? Obviously, they fall out. – a problem for us because if they fall inward, they would go crashing down onto the basement concrete floor – which is not ideal. So, once the logs were getting close to being cut free, we hooked them up with ropes to pull them outward. Once we got to the upstairs windows, we had a bit more of a pulley system because we didn’t really want them crashing down outside either due to safety concerns.
I should note that because of the alternating rebar pattern when placing the logs originally, the logs are also connected to each other via rebar throughout, so all horizontal cuts also involve cutting the rebar to free the logs. This is also very time consuming.
One of the problems with our upstairs windows was that due to height limitations for the house, our upstairs windows go into the gable ends and are not completely surrounded by logs. So, we had to determine how and when best to install those windows and how it impacts the gable ends. We decided that we could/should go ahead and install those windows before we finished the gable ends.
Here are all of the windows cut on the front wall. The upstairs boxes are in to confirm placement and the first window we cut has been installed.


Since we had to adjust the height of the house during the planning phase, we lose a row of windows that were supposed to be at the very top. To maximize light we increased the size of the remaining upstairs windows as much as we could. This means very heavy windows! Luckily, on the front wall we’re dealing with level ground and only one story to reach the windows. We had a couple of Kenyon’s family members to help install those upper windows.

Since the top of the window isn’t really anchored into anything, Kenyon braced the windows until the gable ends are finished. It doesn’t look like much, but the windows are actually very secure up there.

When we left in July 2013, all of the front windows were in. This was not nearly as much work as we had hoped to accomplish but that seems to always be the case!
The other big development that occurred during that week was we finalized a plan for one of our neighbors up there to work as a contractor to help us on the cabin. Since we were to the point of mostly interior work and things that are more “regular” construction rather than LHBA-specific items, we felt OK about having him do some of the work. We were so fortunate to have someone who would be nearby to keep an eye on things, but also he’s retired and doing contracting jobs as part of his retirement, so our expectations/schedules/money definitely lined up!

Winter 2012/2013
The last post was from November 2012. That was the end of the work we were able to do that winter. In February 2013, a job change for Kenyon caused us to pack up and move to Indiana. I was very excited to get back home to the Midwest. The hard thing was (and continues to be) leaving the cabin and not being able to work on it. Every time we told someone we were moving, literally the first thing they said was, “What about the cabin?”.
We decided at that point that we would just keep it and work on it when we could. Our carrying costs are pretty low and with all of the other changes it was too much to think about. So, our plan was to come back in the summer and work on it when we could and go from there. We knew that there may be a point where it just doesn’t make financial sense to keep it, but we weren’t there yet.
Since I’m so behind on posting, I’m just going to do a big 2013 post and 2014 post of everything that we accomplished in each year. And here we go….
Subscribe to:
Posts (Atom)