About Me

We are building our own log home in Utah following the methods of the Log Home Builders Association (LHBA). After a lot of research we really felt that LHBA was the best way to go. We highly encourage you to visit the LHBA website at www.loghomebuilders.org. It seems crazy to think we can do this ourselves, but LHBA really makes you a believer! And remember, we welcome any help!

Sunday, November 4, 2012

Done for the Winter?

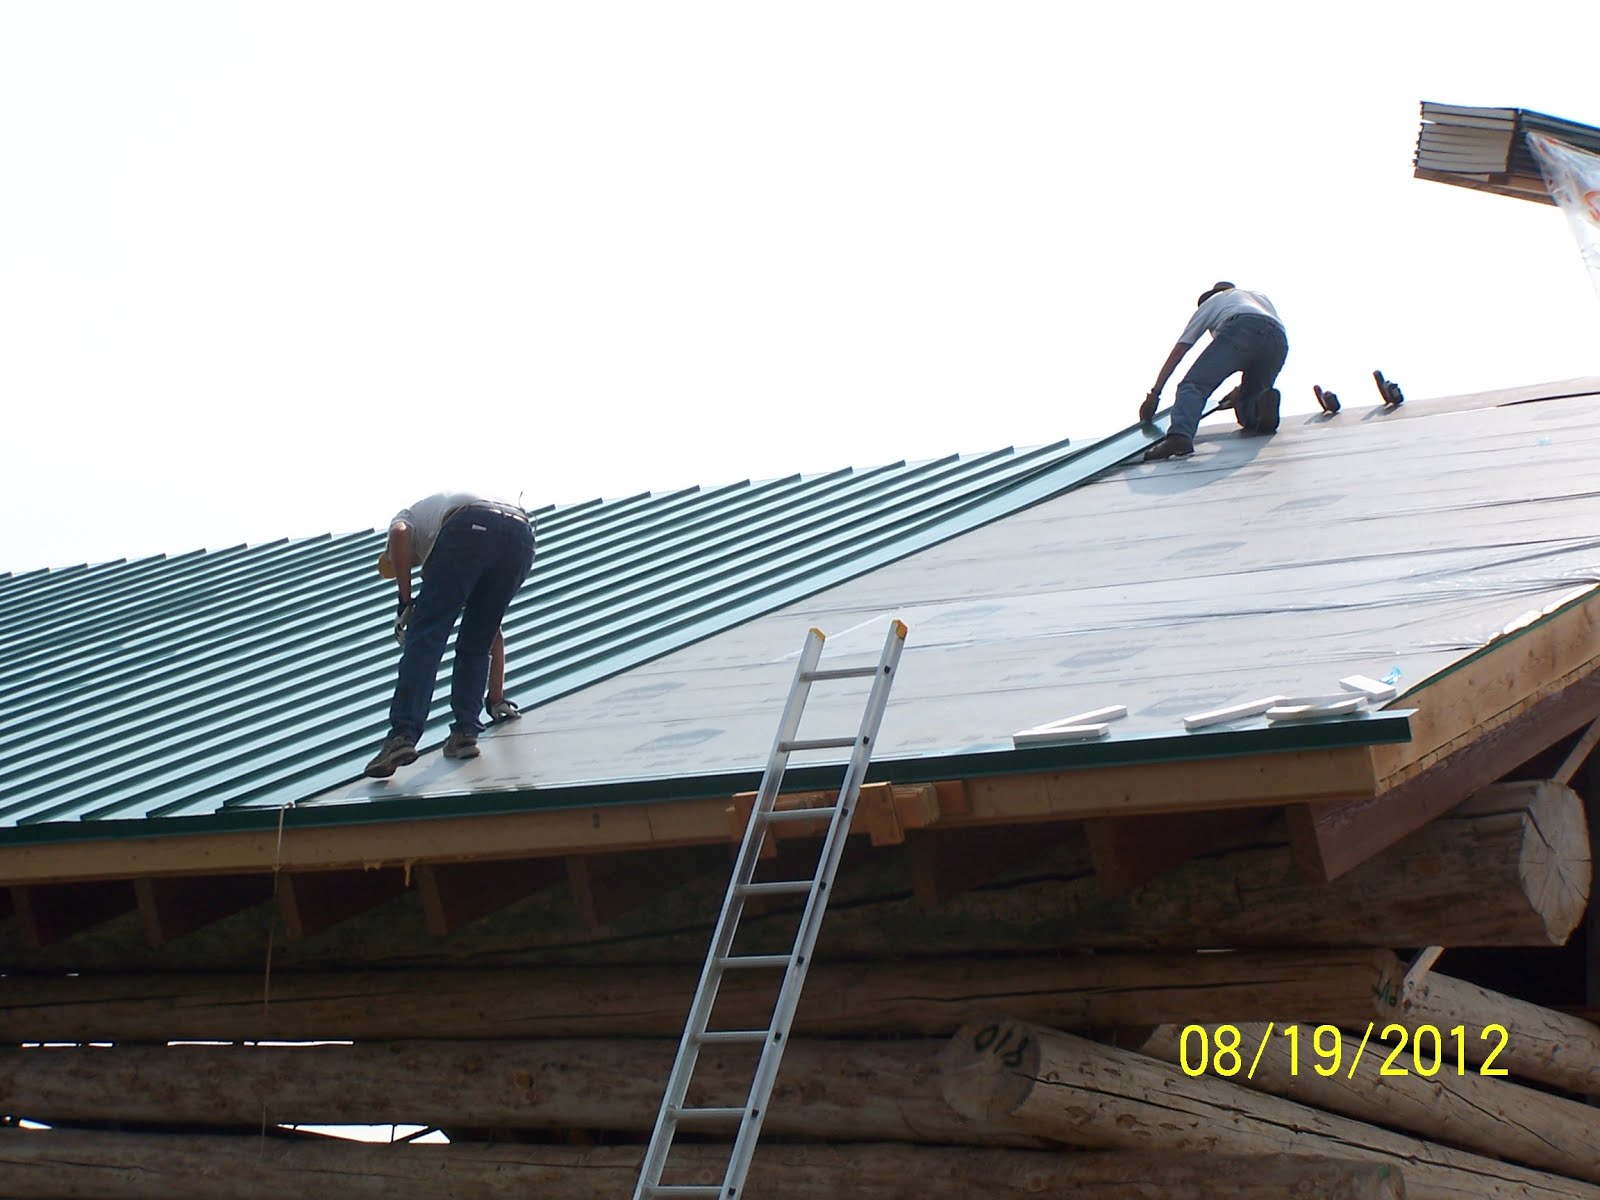
Although there haven't been a lot of posts, a lot has been going on. The whole roof is done, including all of the trim. And, the outside of the whole house is stained! It's exciting to have something that is "done". At first we were concerned that we might not be able to handle something as important as the roof on our own. But, Kenyon spoke with the guy at the roofing store several times, and he was extremely helpful. We felt like we would be able to do it ourselves. When I say "ourselves" I mean Kenyon.

We learned that it's possible to do with 2 people up on the roof, but much easier with 3. The tough part was just manuevering the panels. For a metal roof, such as ours, the panels get made specifically for the length of the roof. So, this is one of those areas that having the bigger size house makes more difficult because that in turn makes the panels longer. The panels actually snapped together fairly easily.

We used the forklift to get the panels up to the roof.

After the first few panels on that side were in place.

Kenyon and his dad actually placing the panels. Between his dad, David and Hunt, we had some extremely valuable help this year. We couldn't have done it without them!
All of the roof panels on.

Another view of the finished roof.

Then it was time to stain. We had had a scare when we found out that the stain choice we had finally made, had changed. It wasn't exactly discontinued but they changed the name and the shades but you could still get the old colors. So, we went ahead and ordered all of the stain we would need for the outside just in case we wouldn't be able to get it in the future. I spoke with a salesman at one of the log home stores and he said that the company has since decided to no longer discontinue the old colors, thank goodness! Since we had all the stain, we decided we might as well go ahead and do that.

We have to try to find some shots of the actual staining. Basically, Kenyon had to go over all of the rough spots or spots where all of the bark hadn't come off and lightly sand them, and then apply the stain. We ended up using 3 coats of stain. My family was able to visit for a weekend, which was great. My dad and Kenyon worked all day each day he was here on the sanding and stain. It was a huge help, although it couldn't have been a very exciting vacation! But we're so fortunate to have been able to have the help!

All of the final trim was stained and put up.

We got everything done just in time for the first snow storm!

Luckily, the snow melted, so we may be able to do a little more, but we may also just stop. At this point, our next step is to put in the windows. We ordered the windows for the front wall, but we're not sure yet if we are going to go that next step or not. Next week it's supposed to start raining/snowing again, so the weather may be making the decision for us.


Tribute to the Yard Stick

It may be surprising but one of the most useful tools during this project has been a yardstick. I do not mean to imply that it is a single yardstick throughout the project, but many, many yardsticks! We buy them by the armload. One time we were at Home Depot or Lowe’s and were going through the checkout line with around 30 yardsticks, the guy looked at us quizzically, “You have some sort of school project?” Our response, “No, we’re building a cabin.” Doesn’t everyone routinely purchase hundreds of yardsticks when they’re building a house?

One time we were stacking logs with the crane, and Kenyon or I needed to measure something so we pulled out a yardstick. The crane operator looked at us like we were crazy and said, “Do you need to borrow a tape measure?” We assured him that the yardstick worked far better.

We have gone through so many, the area around our cabin is a veritable graveyard of yardsticks. Some are mangled, some are broken purposefully, some are warped from a year in the elements, and still others are probably OK, but have been sitting out so long they are covered in dirt so their straight edge is questionable.

Here’s why they are so useful:
- Other than the concrete walls, there are no straight lines or edges on the house, so to measure you need something that will stay flat (we often use in conjunction with a level)
- We used them to measure the heights of the walls as we were building
- We used them to fish straps between the logs to hold the logs in place
- We use them to create templates for drilling, etc
- We used them to measure the rebar on the chop saw before cutting, to reduce the amount of steps
- We used them to measure the height needed for rebar (1 ½ logs)
- We used them to show the center line of the logs
- We use them to extend the length of the concrete wall out far enough to measure up for windows and doors
- Most recently, (and the moment I realized the tribute was necessary) Kenyon used them as a “shoe horn” to get the wood trim up under the metal trim pieces that were already in place

If only there was a big market for yard sticks, I would try to get a sponsor or a job as a spokesman. I must say that I highly recommend the Lowe’s yard sticks because they are slightly thicker and more sturdy than others. Alas, I don’t think Lowe’s is going to be throwing any money at me for advertising yard sticks, perhaps because they cost about 30 cents each.


Finding the centerline of the first log and the concrete wall

Measuring the heights of the wall after each log

Template for nailing OSB

Another template, pre-drilling holes into wood trim

"Shoe horning" wood trim underneath metal

Saturday, July 28, 2012

First Half of 2012

I know, it's been a while - so this is a long post. We have been busy with the cabin and life and I just didn't update the blog. Recap: This is where we ended for winter - all of the tongue & groove (ceiling/paneling) was up and was covered in roof wrap to try to keep it dry.
We started back up this spring once everything was dry. Because we had to quit abruptly with the snow, there was a lot of cleanup to do around the building site. And then we were off.
The way we put up the tongue & groove to optimize the pieces we had, left some overhang off the ends. Rather than cut everything ahead of time, we decided to leave it long and then we would go back later to make it straight. This is what it looked like when we finished in the winter.
The next step is to put up the "internal rafters". The stained rafters that are visible as part of the ceiling are really the structural rafters, but you need something to contain the insulation and help with the roof. These are 2x10 (vs 4x12 for the big ones), and there are twice as many, which is 80 2x10s to be placed 16 inches apart.
As proponents of planning tasks down on the ground and developing tools so that no "thinking" is necessary up on the roof, Kenyon planned out a way to know where to put each of the rafters using brackets. But, before we started doing all of them, we wanted to try it out on one set. Unlike the big rafters, these ones have to be cut to perfectly match up at the peak.
Next, we needed to lift the remaining 78 rafters. This is where our friendly crane driver comes in. He has been a great help! To try to best utilize his time (and minimize cost) we wanted to get all of the rafters up and then place them afterwards. We took them up in bundles.
Kenyon built some safety stops to hold them up there so then he could put them in place.
Progress on the first day with the rafters was much better and faster than expected. We thought it would take quite awhile, but this was after just that first day. Kenyon, his dad, and our good friend, Hunt, got it all done.
It didn't take long to get all the rafters up and done. A lot of nails were needed to do all the brackets and then up and down the rafters.
Kenyon also had to go back and cut the tongue & groove. It was pretty scary, but the cut ended up really nice.
Once all the rafters were up, the cross-bracing was needed. One row at the log wall and another row up at the top above the ridge pole. These are all individual ~16" pieces.
At the ends of the rafters, we now need it to line up with the big rafters below. The roof trim will then go on this part.
Since there is no real attic space, just the ceiling-insulation-roof, any wiring or lights that we need in the ceiling need to be done now. So, being our usual particular selves, we developed an elaborate way of measuring out where the lights should be (we have can lights, and light fixtures/ceiling fans). It sounds like this should be easy, but it's not. Factors include - dimensions are 2-dimensional from a "flat" ceiling, ours is sloped, there are no internal walls yet, there are no real solid measurements because the walls are logs. We then had the electrician out and Kenyon helped him get all the wiring done pretty quickly. These are the lights for the family room.
We then decided to go with the foam insulation. This was after a lot of research and weighing pros and cons. So, if you disagree and think we should have gone a different way - keep it to yourself! Once the insulation was installed, we covered up the whole thing with OSB.
Once the OSB was on, the whole thing was covered in roof wrap. The next step is the actual metal roof! Kenyon did the last few steps in a couple of days time (I was out of town) with the help of his dad, our LHBA friend, David, and our friend, Hunt, it was a lot of work in a short period of time, and he couldn't have done it without all of their help!

Tuesday, December 20, 2011

Winter Break

Once again, I have not posted in awhile. Rest assured, we have been busy trying to get the cabin done to a good point to leave it over the winter. Originally, we wanted to get the roof on, but that didn't happen. Instead we were able to get the Tongue & Groove on (this is the wood "paneling" that will be the visible ceiling). After the Tongue & Groove, you have a hidden set of rafters, insulation, plywood, and then the actual roof. We got all of the T&G up and then covered everything with a roof wrap that will, hopefully, keep it dry throughout the winter. We are very excited that for the most part it is covered. Obviously snow can still get in through the ends and the cracks, but with the way the wind blows we're hoping it won't be too bad. Here's the steps:

The rafters are 4" by 12" beams that are about 28 feet long. They are all stained the dark color which will also be the wall log color. We needed the crane to get them up.


Working on the rafters - Kenyon's dad has been a huge help


Looking up through the rafters


All 40 of the rafters are up


Kenyon with his rafters


Kenyon drilling the rafters into the ridge pole - we don't want them going anywhere


Next was the Tongue & Groove. We had to stain all of this. This was quite an experience and took forever. We did two coats of stain plus a topcoat. We started out staining up in the cul-de-sac using extra pieces of scaffolding as "racks". We fought rain and wind and finally snow. I am so glad it's over! In the end we had to start bringing it home and staining in our garage because it was too cold outside. I think our garage now has a Honey Timber tint. We used approximately 6,864 linear feet of 2"x6" T&G. If you're wondering how much that is - it's a lot, more than you ever want to have to do.

If you know us well, you know that we did everything mathematically. I had a lot of spreadsheets and lists to plan out the most efficient way to use the various lengths of T&G with the least amount of scrap - and keeping the "seams" at alternating rafters. The planning was crucial. It allowed Kenyon to just be on the roof and have everything preplanned so there was no stopping to consider what to do next. It also helped save money because it really was the most efficient usage of the T&G.

Kenyon's brother Spencer came to help. Of course, it started snowing.


Halfway up the first side of T&G. All the snow was making us very nervous, luckily this was the last snow storm for awhile. This was when I started to go up to help. Let's just say me up there, didn't work out. I wouldn't call it a fear of heights, more like a fear of falling 39 feet headfirst onto the cement floor.


While I was sitting watching Kenyon work up on the roof, I decided to take a picture of the snow, to show how crazy it was up there.


This is what it will look like when you're inside the house and looking up at the ceiling. This is the first thing we have done where it is a "final" look. After guessing at stain colors, we're really happy with it. The unstained logs in the picture will eventually be stained the dark brown color.


Another shot looking up at the ceiling. The open ends will get covered eventually.


Final work for the winter. We could not have done it without the help of our LHBA friend, David. The T&G is all up and it is covered with roof wrap. The roofing store guy assures us this will keep it dry all winter. Our fingers are crossed!

Tuesday, October 4, 2011

Ridge Pole Up!

I know I haven't posted our updates lately, so let me catch you up and then I'll post the pictures. We finished the walls - there are 12 rows of logs and they are about 16' 5" from the top of the basement walls. When you finish your walls, the goal is to have all 4 corners within 1" of each other. Before you start, this seems completely reasonable; however, once you start stacking these logs, it seems like that is going to be impossible. We're not talking about perfectly shaped/pieces of wood - we're talking about logs that not only are not at all even but also there are no two alike. I can't believe it, but we actually ended up about 1 3/4" off across all 4 corners. I understand that you are probably like us back when we were naive about such things - but now that we're wiser, we recognize that this is nothing short of amazing.

The next step was to start installing the Ridge Pole Support Logs (RPSLs). These are vertical logs that will support the Ridge Pole which supports the roof. The log has to sit on a piece of all-thread which is sticking up out of the cement floor. The log is pre-drilled so that it will set on the all-thread.

My job was down in the basement with Kenyon's dad. His job was to help guide the log down and make sure we had it coming down in the right place. My job was to be laying on the basement floor to make sure we were lowering it onto the all-thread. Watching a 2500lb log being lowered down with one strap almost on top of you is a bit surreal.


Since I'm guessing that the average reader is not interested in all of the specific details I will gloss over them a bit. I may try to do a post on the LHBA Forums with the details of some of our ideas that made things easier. So, we did 2 RPSLs.


Next, is the girder. This log supports the floor for the 2nd floor. You cut a hole in each side of the house and "thread" the log through the holes. It was a bit tight through the 2nd hole, but it made it.


We finished up with the 3rd RPSL and the Ridge Pole. The Ridge Pole has a tip end diameter of 18" and the butt end has a 33" diameter. It weights between 3500 and 4000 lbs!


Our next steps are to put in some small support logs to support the first floor. Then, we will have the rafters, tongue & groove ceiling, other set of rafters, insulation, plywood, and then the roof. We are going to try to get all of that done before the snow makes us quit. It seems a bit ambitious, but we're crazy, so why not? We do have a lot of help coming out to visit in the next few weeks so that will be great!

We did decide on a stain. We're going with #10 - it's the one on the end.